

I plug a 2 TB Samsung T7 SSD into my MacBook every morning. Most of it holds active code repositories, datasets, and working files. The rest was supposed to quietly run Time Machine in the background.
One morning I opened Disk Utility and noticed the backup volume had grown past 719 GB. That is not an error. Time Machine is built to save hourly, daily, and weekly snapshots so you can roll back files whenever you need to.
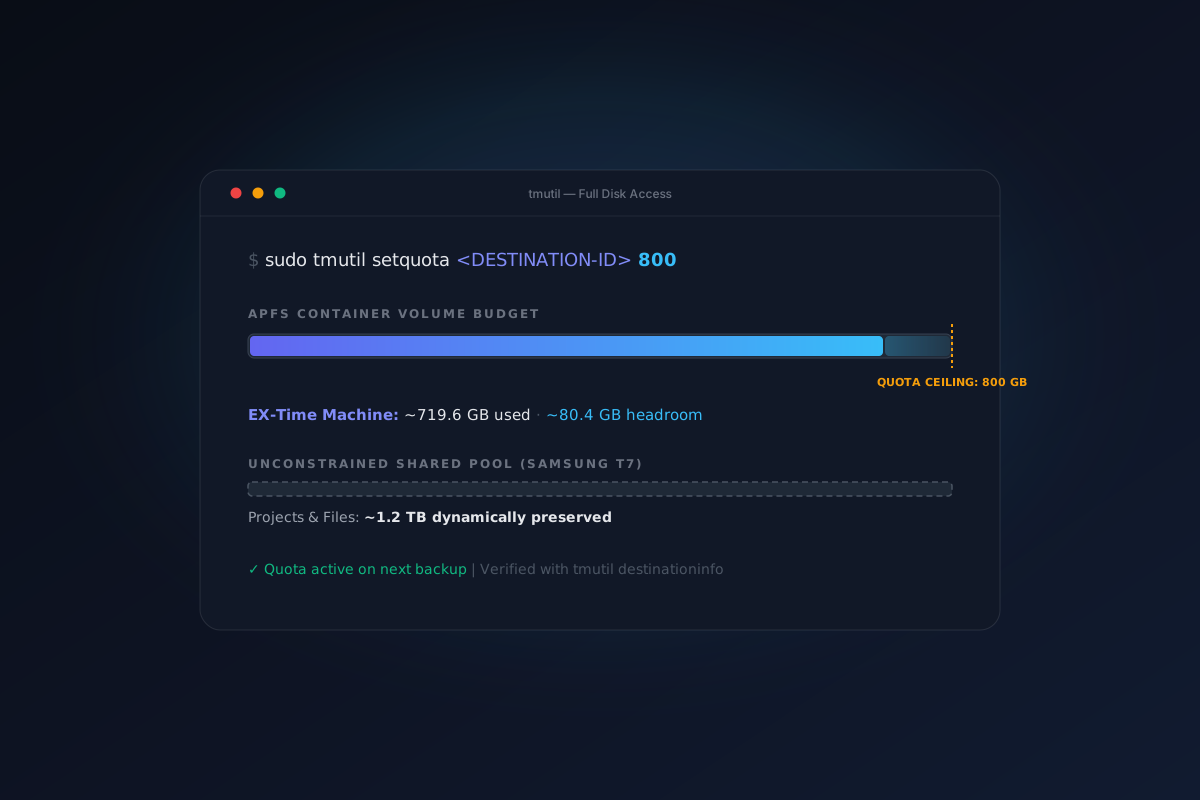
The problem is that APFS volumes share all free space across their container. Without a quota, Time Machine treats every empty gigabyte as available room. If I left it unchecked, it would eventually squeeze out my projects. I wanted a clear boundary: give Time Machine at most 800 GB, and protect the remaining 1.2 TB for my daily work.
The Problem with Shared Storage
My setup looked like this:
The drive was handling two jobs at once. My backup volume had reached 719.6 GB. While that still left room on a 2 TB drive, there was no upper limit to stop it from expanding further.
2 TB Samsung T7 Shield├── EX-Time Machine (Volume)│ └── Quota: 800 GB maximum└── SAMSUNG T7 (Volume)└── Remaining space for projects and files (~1.2 TB)
I did not want to disable Time Machine, and I did not want to delete old backups manually. I simply wanted to tell macOS: use this much space, and stop there.
First, What Is Time Machine Backing Up?
It is easy to get the direction reversed when planning this out. Time Machine copies data from the Mac onto the external drive. The laptop is the source, and the external SSD is the destination.
Apple suggests using a backup drive with at least twice the storage capacity of the Mac. On a 500 GB Mac, that points to about 1 TB or more. But that recommendation is about keeping months of historical versions, not a requirement to run at all. Because I share the disk with my code, 800 GB gave me plenty of backup room while protecting space for my files.
Why APFS Space Sharing Matters
Older filesystems forced you to divide a disk into rigid partitions. If you assigned 800 GB to Partition A and 1.2 TB to Partition B, Partition B could never use empty space sitting inside Partition A.
APFS changes this with space sharing. Multiple volumes sit inside one APFS container and share the same pool of free space dynamically. That means my project volume and backup volume can adapt without wasting storage.
Apple supports keeping Time Machine and regular files on the same external drive, provided they live in separate APFS volumes inside the container rather than in the same folder.
Setting the Quota on an Existing Backup
If you are setting up a fresh drive, macOS can ask you for size limits in System Settings when you first add the backup disk. But if your backup is already running and already holds hundreds of gigabytes, the graphical interface does not give you an option to add a quota later. For that, you need the Terminal tool tmutil.
Step 1: Find Your Time Machine Destination ID
Open Terminal and run:
tmutil destinationinfo
The output looks like this:
Name : EX-Time MachineKind : LocalMount Point : /Volumes/EX-Time MachineID : <YOUR-TIME-MACHINE-DESTINATION-ID>Quota : -
The line Quota : - confirms that no limit is currently set. Copy the value under ID. It is a unique UUID that looks like 12345678-ABCD-1234-ABCD-123456789ABC. You will need it in the next step.
Step 2: Give Terminal Full Disk Access
When I first ran the quota command, macOS refused to execute it:
tmutil: setquota: Operation not permitted
Even with sudo, macOS blocked the change. On modern macOS, root privileges give you standard UNIX permissions, but Apple guards disk management behind a separate privacy system called TCC (Transparency, Consent, and Control). To run disk management commands like setquota, Terminal needs Full Disk Access.
Here is how to enable it:
- Open System Settings → Privacy & Security → Full Disk Access.
- Find Terminal (or iTerm2 / Ghostty if you use an alternative) and switch the toggle on.
- Quit Terminal completely with
Cmd + Qand reopen it so the new permission takes effect.
Step 3: Set the Quota
Run the command with your destination ID and your chosen limit in gigabytes:
sudo tmutil setquota <YOUR-TIME-MACHINE-DESTINATION-ID> 800
The command finishes without extra output. The new limit takes effect on the next backup pass.
Step 4: Verify the New Limit
Run destinationinfo again to make sure the change applied:
tmutil destinationinfo
The quota line will now display your value:
Name : EX-Time MachineKind : LocalMount Point : /Volumes/EX-Time MachineID : <YOUR-TIME-MACHINE-DESTINATION-ID>Quota : 800 GB
You can also check Disk Utility. The volume summary should show a capacity of 800 GB, about 719.6 GB used, and roughly 80.4 GB of available headroom.
Step 5: Run an Actual Backup
Do not stop at the terminal output. Start a real backup to confirm everything still works:
tmutil startbackup --auto
The backup completed cleanly. The drive now operates with predictable boundaries:
What Happens When Time Machine Hits the Limit?
A common concern is whether Time Machine will stop working or crash when it reaches 800 GB. It will not. Time Machine manages its own history. When disk space runs low, it automatically removes the oldest daily and weekly snapshots to make room for newer ones.
It never deletes your most recent backup. A quota simply determines how far back in time you can go. A generous quota preserves months of snapshots, while a tighter quota keeps fewer older versions.
Important Edge Cases
What If Your Backup Is Already Bigger Than the Target Quota?
In my case, I was using about 719.6 GB and set the quota to 800 GB, so I had some breathing room. But if your backup is already sitting at 950 GB, trying to force an 800 GB quota right away can cause issues.
- Start with a quota above current usage: Set it to something like 1 TB first, and let older snapshots age out naturally.
- Add exclusions for throwaway files: In System Settings, exclude heavy development directories like
node_modules, Python virtual environments, and build caches so future backups stay compact. - Recreate the volume only if history is not needed: If you do not care about past versions, you can erase the APFS volume and start fresh with a quota. Deleting an APFS volume permanently removes all historical backups.
External Backups vs. Local APFS Snapshots
Setting a quota on your external SSD does not stop macOS from creating local snapshots on your Mac when the external drive is unplugged. Those are separate. macOS keeps them on the internal disk and purges them automatically whenever internal space is needed.
Things I Would Avoid
- Do not publish your real destination ID: Use placeholders like
<YOUR-DESTINATION-ID>if you share your terminal output. - Do not copy my 800 GB number blindly: Choose a size that matches your Mac storage, file change frequency, and project needs.
- Do not assume sudo solves every permission problem: Modern macOS security requires Full Disk Access for disk operations.
- Do not treat this as a complete backup strategy: A quota limits space, but it does not protect against drive failure.
The Bigger Lesson: This Is Not a Full Backup Strategy
Using tmutil setquota solved my immediate storage headache. My Samsung T7 SSD now has predictable room for both active projects and system backups without running out of space.
Still, keeping your working files and your backup on the exact same physical drive means that if the drive fails, gets lost, or suffers hardware damage, you lose both copies at once.
The classic 3-2-1 backup rule suggests three copies of important data on two different types of media, with one copy kept off-site. A storage quota makes local backups manageable, but an encrypted off-site backup is still essential.
Quick Reference
- Find destination ID:
tmutil destinationinfo - Enable Full Disk Access: System Settings → Privacy & Security → Full Disk Access → Terminal, then restart Terminal.
- Set the quota:
sudo tmutil setquota <YOUR-DESTINATION-ID> 800 - Verify: Check
Quota : 800 GBintmutil destinationinfoand Disk Utility. - Test: Run
tmutil startbackup --autoto verify that the backup finishes cleanly.
References
- [1]Apple Support: Back up your Mac with Time Machine · Apple SupportOfficial setup guide and hardware recommendations.
- [2]Apple Support: Connect a new backup disk to your Mac · Apple macOS User GuideInitial setup flow in System Settings and disk configuration.
- [3]Apple Support: Backup disks you can use with Time Machine · Apple SupportSupported storage formats and filesystem requirements.
- [4]Apple Support: Add, delete, or erase APFS volumes in Disk Utility · Apple Disk Utility User GuideManaging APFS containers, volume quotas, and reserve allocations.
- [5]Apple Support: If Time Machine recommends a larger backup disk · Apple macOS User GuideCapacity sizing guidelines and snapshot pruning behavior.
- [6]Apple Support: If you can't back up or restore your Mac using Time Machine · Apple SupportTroubleshooting backup issues and disk errors.
- [7]tmutil(8) Manual Page · macOS Developer ManualOptions for destinationinfo, setquota, and Full Disk Access requirements.